I come from a long short well, a line, anyway, of fabulous Hallowe’en costume-makers, ie. my mom, who as well as being a fantastic doctor and a very smart lady is also an excellent seamstress. (Seriously. How can I live up to that?)
Every Hallowe’en my brothers and I would each decide what we would like to be, and mom would make it happen. Teenage Mutant Ninja Turtle? Sure! Here’s your giant puffy brown felt shell that fits on like a backpack! Batman and Batgirl? No problem! Have an intricately sewn bat-logo and handcrafted button-up utility belt with loops and pouches for your tools and weapons. (Worn over a leotard and tights worn over a snowsuit. I did vow that I would never make my kids wear a snowsuit under their costumes unless it was ACTUALLY SNOWING). Devil? Okay, one red pantsuit, caplet, tail, and hood with puffy horns coming up!
Hands down, her crowning achievment though was the creation of adult-sized Teletubby costumes using toddler-sized patterns for a sailing regatta costume contest (We won. And immortalized the line, “La-la wants a BEER!”).
Anyway, when it comes to Hallowe’en costumes I have big shoes to fill. This year Molly chose a princess costume at the store and Ben decided that in keeping with the theme Molly had set, he would be a brave knight. (Molly has since changed her mind and decided to be Santa, but that’s a whole other story).
Ben and I looked online for costumes but I was unhappy with the shipping charges. A trip to the dollar store looking for a sword inspired me and I decided that I could make the costume myself, so I stocked up on materials and went for it.
Brave Knight Costume
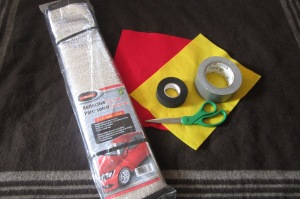
Materials needed: 1 reflective car windshield sunshade, felt (2 colours), black hockey tape, and scissors.
Step 1: Fold sunshade in half width-wise and cut into approximately t-shirt shape, curving down from the shoulders and widening slightly at the bottom. NB – All of these pictures show the costume folded over – the top of the shoulders is NOT cut and it looks the same on the other side.
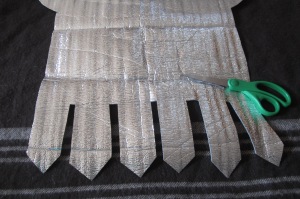
Step 2: Cut pointed strips from waist down with small spaces between them to form “skirt” of armour. Repeat on the other side.
Step 3: Edge the entire costume with black hockey tape.
Step 4: Make a 2-colour design out of felt to be your brave knight’s symbol. I went for simplicity and made a shield, but other options include cross, lion, dragon, or anything your brave knight can think of of which your brave knight can think. (That’s for my brothers.) I edged and attached it with hockey tape as well but glue would also work.
Add a black belt and weapons and your brave knight is ready to do battle!
I know I hit it out of the park this time when Ben came to inspect my progress as I was half-way through the hockey tape border. His jaw dropped and eyes widened and he gasped and said, “I LOVE it!” Now he has another project for me – he said yesterday, “Mommy, now you have a big job to do – make a dragon costume for daddy.”
MO-O-O-O-OMMM…HELP??
~ karyn


