Archives

Molly has quite the ‘eye’ for art

If Ben is my intellectual, Molly is my visionary. She has a flair for the artistic and attention to detail that I find quite amazing. I talked a bit in my Santa letter post about supposed gender differences when it comes to fine motor skills. In my kids’ case there is definitely a Ben/Molly difference but the jury is still out on whether or not this relates to gender.

As early as a year ago, her teacher was marveling at her focus when it comes to crafts. One of the first crafts she did in her toddler program was a sheep – Molly’s was evenly covered in cotton balls and her teacher told me, wide-eyed, that Molly (under 2 at the time) had sat at the table for half an hour carefully gluing on cotton ball after cotton ball until she was completely satisfied with the end result.

She loves working in mixed media (aka “cutting and bluing”) and has an obsession with googly eyes. Here is the first piece she created when given a supply:

First googly eye picture

Mixed media art by Molly –
Googly eye arch
©PicklesINK 2012

That piece was from about 5 months ago. In the last little while she has developed a sort of a trademark – Can you spot it?

Googly faces

Three mixed media pieces by Molly
©PicklesINK 2012

Today while Ben was at school Molly decided that she would like to paint, so I gave her a canvas, paint and Q-tips as well as some glue and things to glue (googly eyes, jewels, sequins, wooden hearts, and “crumplies,” which are crumpled squares of crepe paper). NB – I’ve become a really big fan of Q-tips for crafts. In addition to paintbrushes they make excellent glue wands.

Molly mixed media 2

Molly with art supplies deciding on her first move.
©PicklesINK 2012

She started by painting shapes – a yellow “rainbow” (arc) and pink circles, followed by orange squiggles. This was all deliberate – she described what she was painting to me as she worked.

Molly mixed media 4

Molly paints a yellow rainbow and pink circles.
©PicklesINK 2012

She then carefully filled in the shapes with purple.

Molly mixed media 7

Molly fills in shapes with purple.
©PicklesINK 2012

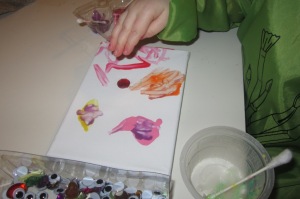
She added pink and red “slides” (think playground slides) and then added a red jewel.
Molly mixed media 10

Molly adds a red jewel to her painting.
©PicklesINK 2012

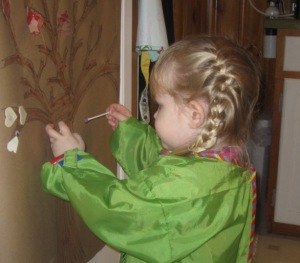
At this point, she got distracted by another work in progress – a little while ago, Ben and Molly collected some fall leaves outside and I tried to organize a craft for Ben that was a bit of a flop. I drew a tree and suggested that he glue the leaves they had collected onto the branches. Unfortunately, it turned out that white glue is not particularly effective on freshly fallen (not dried out) fall leaves, and once they dry out they are really too crumbly to work with, so we abandoned that project. The picture has stayed taped to the cupboard door (It’s the best easel I’ve found!) and every once in a while Molly adds something to it (previous additions include the three hearts and a googly eye on the left).
Molly mixed media 12

Molly’s tree picture – a work in progress.
©PicklesINK 2012

She worked on this piece diligently for a little while and then asked me to take a picture, presenting it with a “ta-da!”

Molly mixed media 17

Molly showing me her picture – “Ta-da!”
©PicklesINK 2012

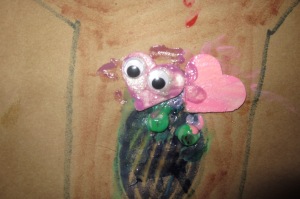
She had painted the pre-existing googly eyes green (“Ben will love this because he loves green!”), and added the rest.
Molly mixed media 16

“Ta-da!” New additions to tree picture:
Two painted hearts, one with eyes.
©PicklesINK 2012

After that she went back and forth between the two projects, adding bits and pieces here and there until she was satisfied with the finished products. Did you spot the trademark googly-eye, crepe-paper-mouth faces before? Here they are again!

Molly mixed media 21

Finished tree picture has 3 faces –
Can you spot them all?
©PicklesINK 2012

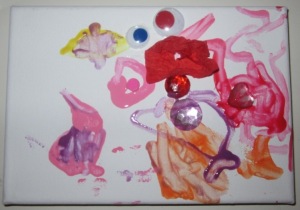
Interestingly, when Molly first asked for paint, she specified that she wanted every colour except green: “No green, mommy. I don’t need green.” I gave her the green anyway, and the only place she used it was on the eyes on the tree. Apparently her vision of her original project (the canvas – see below) had no green, and she remained true to that vision. In fact (and I’m probably reading too much into this now) the heart-shaped jewel was originally pale green and she painted over it in red, so there is absolutely no green on this picture – maybe this is her way of making sure it is clear that this was her work alone, completely independent of Ben?
Molly mixed media 22

Finished mixed-media on canvas
©PicklesINK 2012

If you’re still not convinced about both Molly’s attention to detail and googly-eye obsession, feast your eyes on what happened when she was left unattended with craft supplies for about 10 minutes yesterday:

googly eye sculpture

Mixed media paint and googly eye
egg carton sculpture.
©PicklesINK 2012

If you look very, very carefully, each googly eye has been affixed to the edge of the egg carton with identical-coloured paint with the exception of purple paint substituted in the absence of blue.

I’ve said it before, and I’ll say it again – my kids are nuts.

~ karyn
Letters to Santa = In the mail!

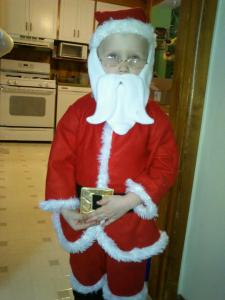
Ben and Molly’s school held a Breakfast With Santa this weekend, which was awesome, except that even with their self-professed adulation of the jolly old elf (see exhibits A and B)

Ben in his Santa costume - Halloween 2011©PicklesINK 2012

Exhibit A: Ben in Santa costume
Halloween 2011
©PicklesINK 2012

Ben and Molly - Halloween 2012

Exhibit B: Molly in Santa costume
Halloween 2012
©PicklesINK 2012

…they both went super shy when the moment came to actually meet him! Ben sat on his lap and grinned but couldn’t talk and Molly wanted nothing to do with him at all.

They recovered themselves by the afternoon though and sat down to the important business of writing their Christmas lists and letters to Santa. Ben’s 3 Rs are coming along AMAZINGLY (thanks, Miss Heather!!). His reading skills boggle my mind. There is nothing he can’t read, and if he stumbles over a “tricky letter” (today’s example: the “c” in “scene”) he asks for help, nods, and then files the irregular rule away in his “remembering cap” and that’s that – he’s got it down.

Printing has been a bit more of a struggle. His fine motor skills have never come as quickly as the intellectual piece, and he gets frustrated when he can’t reproduce what he sees in his head (in this case, the letters) on the paper to his satisfaction (he also gets frustrated when I praise him for letters that he has formed that he doesn’t feel are up to par, but his perfectionism and the question of to praise or not to praise can be the topic of another post!).

I’m told that there is a sex difference at play – that little girls tend to master the fine motor skills more quickly. The chicken-or-egg part of that equation is still up for debate in my mind – Do girls progress more quickly because we give them more opportunities or do we give them more opportunities because they show more interest/get less frustrated? I will say that Molly is currently showing more interest in and patience for fine-motor-oriented crafting at a younger age than Ben did. Again, definitely fodder for a whole other post!

Anyhoo, his printing is coming along beautifully, when he can be convinced to do it, and he worked extremely hard on his letter to Santa:

Ben's letter to Santa 2012

Ben’s Letter to Santa
©PicklesINK 2012

It reads:

Dear Santa,

Does Rudolph really have a lightbulb for a nose? (Then, dictated by Ben and printed by Ian) –  For Christmas I would a toy Whiff engine, a toy Diesel engine from Thomas, toy Kevin from Thomas, and a Mighty n Mac from Thomas.

(Closing printed by Ben)From Ben

Molly dictated her letter to Ian:

Molly's letter to Santa

Molly’s Letter to Santa
©PicklesINK 2012

It reads:

Dear Santa,

How are your reindeer? I am excited for Christmas this year. I would like things for my dollhouse and dollhouse toys. (Santa brought her the dollhouse last year. There was some prompting by Ian for her list since she just kept repeating “I want Santa to bring me dollhouse.”) Or maybe you could bring me a surprise. I love surprises that are pink!

Love Molly

She adorned it with her decoration of choice, googly eyes, and a wooden heart. Her trademark is googly eye faces – 2 eyes and a mouth made of twisted tissue paper (again with the fine motor skills being in a different ballpark than Ben’s at that age) – but for some reason she couldn’t be convinced to give her Santa letter googly guy a mouth.

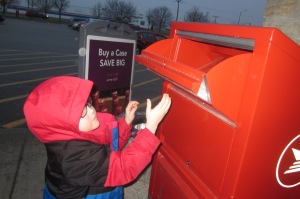
Then it was off to the mailbox for the big moment:

Ben Mailing

Ben mailing his letter to Santa
©PicklesINK 2012

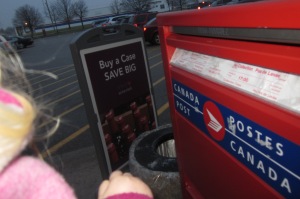
Molly mailing

Molly mailing her letter to Santa
©PicklesINK 2012

Mission accomplished

Mission accomplished!
©PicklesINK 2012

Now I can finally sit down and see about getting Santa to make videos for Ben and Molly. (If you haven’t yet heard of the Portable North Pole Console, check it out!) Last year I got the order of events wrong and Ben was very concerned with how exactly Santa knew what he wanted for Christmas when he hadn’t told him yet.

~ karyn

Have you/your kids written your letters to Santa? What’s on your list?


Life is a great big canvas

Life is a great big canvas, and you should throw all the paint on it you can.

~ Danny Kaye (1913-1987)

I picked up the raw materials for a craft for Ben and Molly a little while ago and have been saving them for a rainy day. The opportunity presented itself last week so I set them up and let them go to it!

Cotton swab (Q-tip) painting on canvas – materials:

  • Cotton swabs
  • Paint
  • Small white canvases
  • Egg carton
  • Painting smocks

Paint, cotton swabs, canvases and egg carton.
©PicklesINK 2012

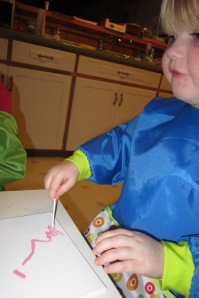
I put a different colour of paint into each egg cup and stuck a cotton swab in each. The only instruction I gave to Ben and Molly was to use each cotton swab for only one colour. I wanted them to be able to mix the colours on the canvas while keeping them unique in the cups.

Molly painting a pink line.
©PicklesINK 2012

Molly, true to form, immediately picked the “pretty, pretty pink!” (With some urging from Ben – “Look Molly! There’s pretty pretty pink paint!” – There’s a bit of a chicken or egg situation when it comes to Molly’s love for bubblegum colour.)

Ben, painting coloured shapes.
©PicklesINK 2012

Ben started with his favourite colour, green, and concentrated on making distinct shapes, one of each colour.

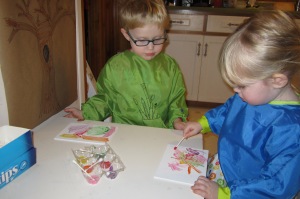
One of the things I find really neat about Ben and Molly is how close they are to one another and how interested they are in each other’s activities. I was wandering around tidying etc. while they were painting but snapped pictures occasionally of what I thought what their singular focus on their own paintings. I didn’t realize until I looked at the pictures on the computer screen tonight that I had captured two very typical Ben and Molly moments:

Molly watching Ben paint.
©PicklesINK 2012

Molly taking a break from her painting to watch intently as Ben paints;

Ben watching Molly paint.
©PicklesINK 2012

And vice versa.

Ben has always struggled with his fine motor skills (inasmuch as what he is capable of producing does not match up to his satisfaction with the picture in his head, which frustrates him), so drawing and painting have not generally been his favourite activities. He seemed to find the cotton swabs an easy tool to manipulate and he concentrated very hard to paint one shape in each colour. He was incredibly proud to sign his name to his finished product and wants to hang it in his room!

Molly started out painting directly on the canvas and then took the craft in a uniquely Molly direction and started painting her fingers and hands and making prints for a neat effect of layered multi-coloured handprints.

While watching Molly start painting her hands for a second painting, Ben said, “Oh no, Mommy! Do you see what the paint says? It says, ‘Washable’!” Thinking he had misunderstood, I said, “It’s okay, bud – that means it will wash right off Molly’s hands.” Ben said, “No, mommy! It’s WASHABLE! We have to be careful never to get my painting WET!”

The finished paintings:
Ben’s, above, and Molly’s two below.
©PicklesINK 2012

The colors live a remarkable life of their own after they have been applied to the canvas.

~ Edvard Munch (1863-1944)

I will be very, very careful to never get these paintings wet!

~ karyn

I’m calling it a knight!

I come from a long short well, a line, anyway, of fabulous Hallowe’en costume-makers, ie. my mom, who as well as being a fantastic doctor and a very smart lady is also an excellent seamstress. (Seriously. How can I live up to that?)

Every Hallowe’en my brothers and I would each decide what we would like to be, and mom would make it happen. Teenage Mutant Ninja Turtle? Sure! Here’s your giant puffy brown felt shell that fits on like a backpack! Batman and Batgirl? No problem! Have an intricately sewn bat-logo and handcrafted button-up utility belt with loops and pouches for your tools and weapons. (Worn over a leotard and tights worn over a snowsuit. I did vow that I would never make my kids wear a snowsuit under their costumes unless it was ACTUALLY SNOWING). Devil? Okay, one red pantsuit, caplet, tail, and hood with puffy horns coming up!

Hands down, her crowning achievment though was the creation of adult-sized Teletubby costumes using toddler-sized patterns for a sailing regatta costume contest (We won. And immortalized the line, “La-la wants a BEER!”).

Anyway, when it comes to Hallowe’en costumes I have big shoes to fill. This year Molly chose a princess costume at the store and Ben decided that in keeping with the theme Molly had set, he would be a brave knight. (Molly has since changed her mind and decided to be Santa, but that’s a whole other story).

Ben and I looked online for costumes but I was unhappy with the shipping charges. A trip to the dollar store looking for a sword inspired me and I decided that I could make the costume myself, so I stocked up on materials and went for it.

Brave Knight Costume

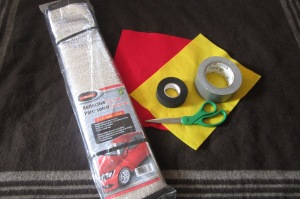
Materials needed: 1 reflective car windshield sunshade, felt (2 colours), black hockey tape, and scissors.

©PicklesINK 2012

Step 1: Fold sunshade in half width-wise and cut into approximately t-shirt shape, curving down from the shoulders and widening slightly at the bottom. NB – All of these pictures show the costume folded over – the top of the shoulders is NOT cut and it looks the same on the other side.

©PicklesINK 2012

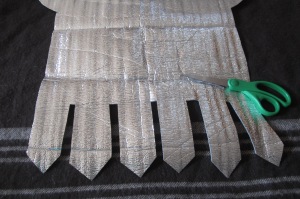
Step 2: Cut pointed strips from waist down with small spaces between them to form “skirt” of armour. Repeat on the other side.

©PicklesINK 2012

Step 3: Edge the entire costume with black hockey tape.

©PicklesINK 2012

©PicklesINK 2012

Step 4: Make a 2-colour design out of felt to be your brave knight’s symbol. I went for simplicity and made a shield, but other options include cross, lion, dragon, or anything your brave knight can think  of of which your brave knight can think. (That’s for my brothers.) I edged and attached it with hockey tape as well but glue would also work.

Ta-da! ©PicklesINK 2012

Add a black belt and weapons and your brave knight is ready to do battle!

I know I hit it out of the park this time when Ben came to inspect my progress as I was half-way through the hockey tape border. His jaw dropped and eyes widened and he gasped and said, “I LOVE it!” Now he has another project for me – he said yesterday, “Mommy, now you have a big job to do – make a dragon costume for daddy.”

MO-O-O-O-OMMM…HELP??

~ karyn